
Having the Eye and Some Rules I Use
Sometimes when I am
not looking or thinking
about my next post I
read something on someone
else's post.
Ann over at
gave me this idea
from her post of her
showing her granddaughter
a few pointers with the camera.
Thanks Ann.
Years ago (YEARS)
my grandson Caleb and his
mom came to live with me.
Caleb was like a week from
turning one.
This was to be temporary.
Longest temporary of
six years I ever been through!
lol
Anyway, Caleb and I had
a lot of nana and grandson
time together.
He was my shadow.
I taught him how to clean
a john (lol), strip wallpaper,
use a hammer and screwdriver,
make his bed, cook etc.
As he got older, moved out
with his mom, he would go out
with me when I took the
camera and ran away.
I would let him use my
big camera but when I
got my 2nd back up camera
I allowed him to use one
while I used the other.
He was about nine when I started
letting him use the cameras and
I was impressed.
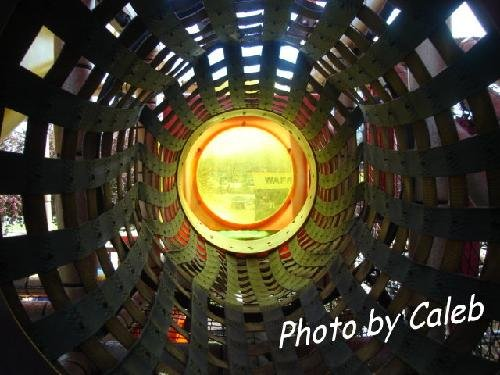
We stopped one day at
Dairy Queen and he
went up in the crawling kid
thingy.
This pic was taking while
he was playing on the
crawling thingy.
Pretty neat shot.
This one also.

I thought it was
cool that as we were
driving around he saw the
clouds in the window.

This is a shot like his
nana shot, only I prob
would only have shot this
if it was rusted.

Speaking of rust,
my old mailbox. I sent
Caleb to get the mail

I loved the way his mind
worked.
Like looking up under the branch
of a tree to shoot this bug.

He used the zoom lens on this
shot but even still, he had to
get close enough to get
a great pic.

These next shots he
was 19 when we to the
park for family pics.


He climbed up on
a branch that was hanging
low and took a shot looking
down the branch.
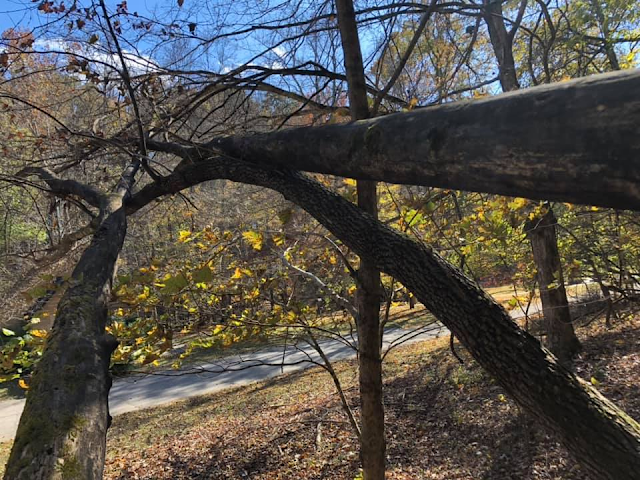
Like I said, I love the
way his mind works.

next two shots.


taught him well but
a lot of being a photographer is
how you look at things.

Had a friend tell me once
when looking at a pic I
took of a brick in the creek,
she told me, "that she could
take the same pic and it would
not look that good. It would look
like a brick in the creek, where
mine looks like art."
Another friend told me that
he thought that my being an
artist with my painting helped
to open my eyes to
seeing the world differently.
It is funny, at times I will look
at a pic and call out the colors
in oils that it took to paint that.
Recently a friend posted a pic
on fb of the ocean in Fla.
I commented that I could see the
cobalt blue, ultramarine
blue, white and purple in that
pic and he came back with,
"there's that artist"!
What I tell younger folks wanting
to work on photography skills~
1. Look for that different angle.
With the brick I was
telling you about earlier,
I walked around the creek,
looked at the angle of the
brick, what side looked the
best. Was the sun shining on it
or the shade covering it
to make it pop?


I could have shot the above
building straight on, but I loved
this angle.
Another angle, under a flower.

2. Don't always shoot straight on.
See how I shot this with
the bottom of the Queen Anne's
Lace, but it is also hanging out
of the frame. Shooting like this
draws your eye to more than
one thing. The beautiful sky!
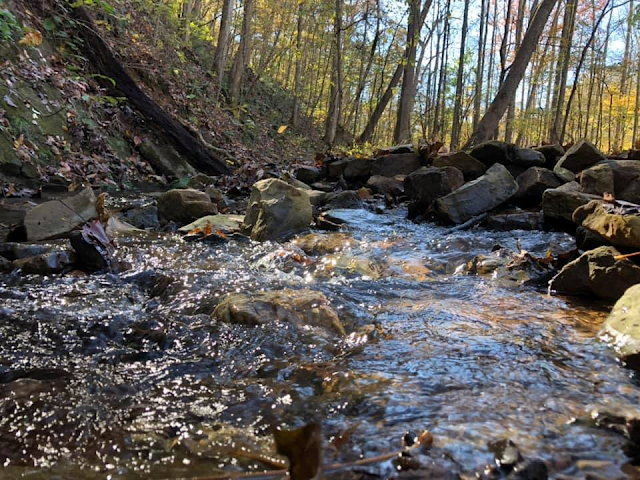
Also, in this pic below.
Most folks would shoot for the
sun setting and have it
smack dab in the center.
Nothing wrong with that, but
off center brings in more
of the water and trees in
for viewing also.
More to bring your eye
to the pic.

There again, the rocks are
not just the focal point, you
have water also.

3. Use your surroundings.
This is why I dislike
shooting inside. I rather do
it all outside. You
have the natural element to
bring into your pics.
Like this shot of Holly
(niece).

I could have gotten Holly
standing straight up in
front of the lake but I
wanted to add to the pic so
I had her lean up on the tree.
Same in the pic below
of my niece, Jessica.
Rather than have her stand
or sit in the leaves, play with
them.

Using the tree and the
BIG root along with
the bamboo in this shot
of my son and DIL
added a great back drop.

4. Use props
Here I used the natural
element of the trees, and
the rocks (even though
they were built to look
natural), the water and
a pop of color in the
prop of a chair.

Another natural element
shot with a prop.

Here I used natural, and
man made with props.

5. Use what is around you,
even if man made.


But most important...
HAVE FUN!
Thanks for the idea on
this post Ann.
Pam


Comments
Have a fabulous day, weekend and a very Happy New Year, Pam. Scritches to the furbabes. ♥